1. In the Administrative part of your Job board application navigate by the following path:
Settings: Payments: Payment systems integration
2. System will offer all currently integrated payment options:

You are able to edit them: Payment systems management.
3. Open Authorize.net properties (click on logo or ![]() )
)
You will be offered to see the Authorize.net properties screen:
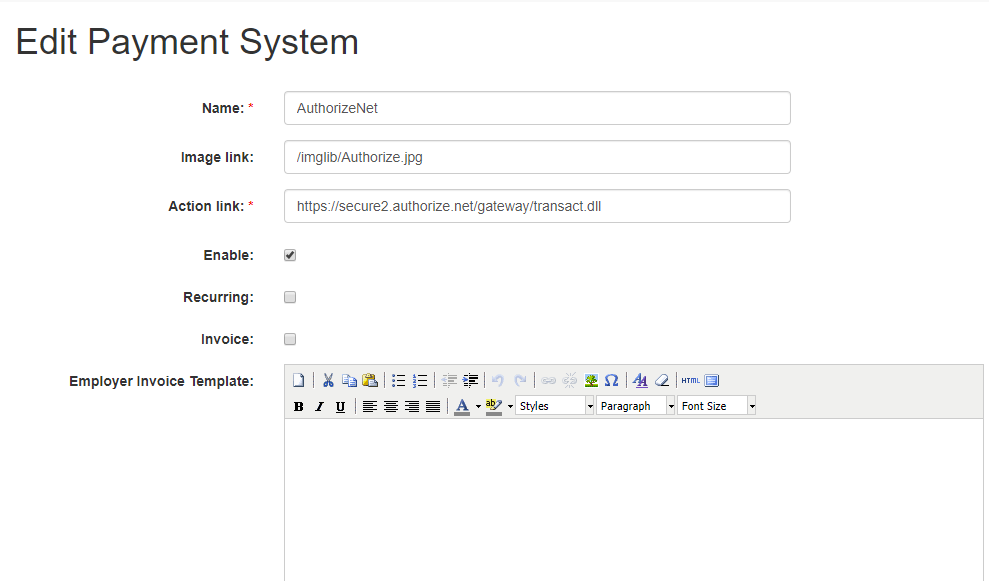
4. Supply either test or live account settings:
Test account
Create your own test account on Authorize.net or inquire for JobMount test account details so you can test website payments and services activation before launching your job board.
Live account
Supply live account data when your job board software is ready to go online.
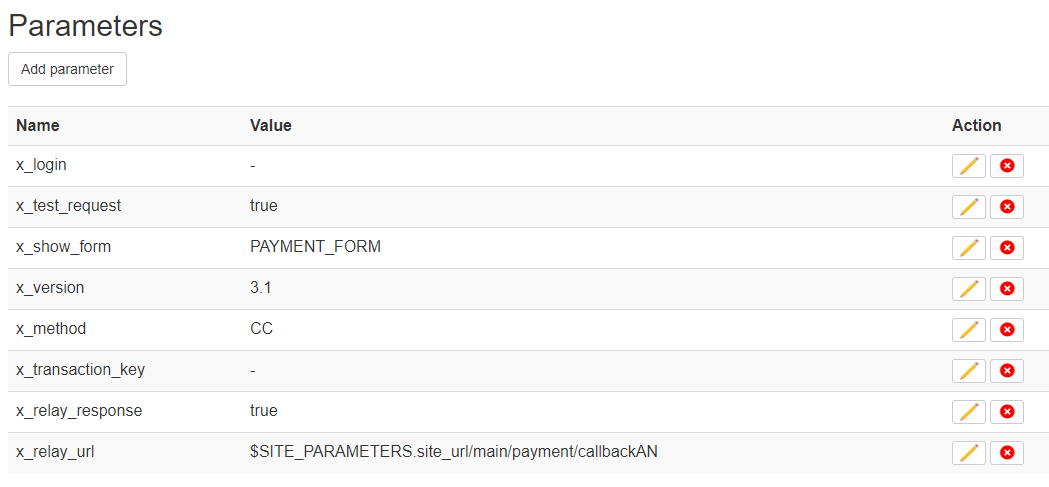
Payment gateway account properties which are supplied:
– Authorize.net Server Integration Method (SIM) test mode settings are supplied for you in JobMount admin by default.
– Provide your unique API login (x_login) and a transaction key (x_transaction_key) – 16 characters.
– Turn off the test mode by setting x_test_request to false and change Action link to secure.authorize.net/gateway/transact.dll
– Confirm if the website URL is correct in “General Parameters” global settings.
5. In Authorize.net account settings specify Silent Post URL and the Relay Response URL values, please set
http://www.yourdomain.com/main/payment/callbackAN
6. Save changes.