Contents1. Types of menu |
Types of menu
Explore Three Menu Options to Tailor Your Website:
Top – This menu type offers two distinct views: Candidate top menu view and Employer top menu view. Any items you include in this menu will appear prominently at the top of your website, exclusively for unlogged candidates and employers.
Features – Within this menu, you’ll find two views as well: Candidates top menu view and Employers top menu view. Items placed in this menu will be visible at the top of the site, but only to logged-in candidates and employers.
Bottom – This menu is shared by both candidates and employers, but its contents can vary depending on whether visitors are logged in or not (see more info on logged/unlogged checkboxes below).
How to add a new menu link
Add new menu items (sections or pages) via:
Settings: Appearance: Menu: Top: Candidates or Clients
Settings: Appearance: Menu: Features: Candidates or Clients
Settings: Appearance: Menu: Bottom
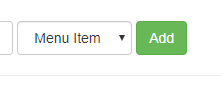
1. Click Add button
2. Fill in menu items by providing a Name, URL, Tip Title text, and specifying whether the link should be displayed for unlogged visitors, logged visitors, or both.
Additional Information: When creating a top menu item in the TOP or FEATURES tab, the “Logged” checkbox selection doesn’t matter. The system will automatically display menu items from the first section to unlogged users and menu items from the second section to logged users.
However, when you’re adding a BOTTOM menu item, be sure to indicate whether you want it to be visible to logged users, unlogged users, or both, ensuring a tailored user experience on your website.

Leave other fields empty as they are reserved for system functions.
Menu editing
Edit menu items, delete them, sort, change link or rename via:
1. Navigate job board software Admin
Settings: Appearance: Menu: Top: Candidates or Clients
or
Settings: Appearance: Menu: Features: Candidates or Clients
or
Settings: Appearance: Menu: Bottom
2. Choose menu to update:
- Top
- Candidate
- Client
- Features
- Candidate
- Client
- Bottom
3. Example: Candidate menu editing

– Add new sections (How to add new menu link)
– Edit existing sub sections:

Sorting of menu links
Navigate to
Settings: Appearance: Menu: Top: Candidates or Clients
or
Settings: Appearance: Menu: Features: Candidates or Clients
or
Settings: Appearance: Menu: Bottom
1. Click SORT button at the top

2.Drag & drop the items holding ![]() icon.
icon.
Drag the field / line higher or lower and drop to save the new positioning.